If you’ve ever worked with a design agency on a printed document or marketing collateral, it may sometimes seem like they’re speaking a foreign language. The print design world contains many words and phrases that are unfamiliar to the average person. But if you don’t understand the basic terminology, you could end with a printed piece that doesn’t look the way you want. Worse, it could lead to the dreaded (and costly) reprint process – an outcome nobody wants.
To help make sure your print projects come out right the first time, here’s a basic glossary of important print design terms.
Bleed. This refers to any design element on a print piece that extends past the edge of the paper. Designers indicate a bleed by setting up the document with a bleed mark, typically measuring 0.125 inches past the trim area of the final printed piece.
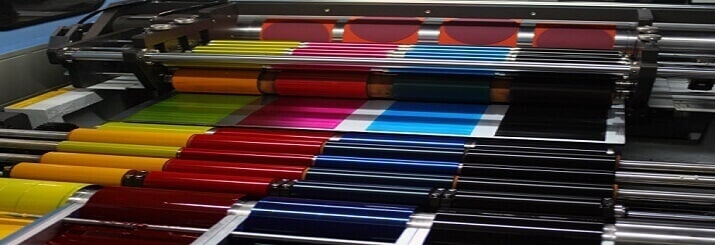
CMYK. No, this is not dyslexic for “check your mail.” CMYK stands for the combination of ink colors most commonly used in 4-color process or digital printing: cyan (blue), magenta, yellow and black (represented by the “K”). Images in print documents are always printed in CMYK, and must be converted from other color formats to CMYK before printing, unless it is a low-Pantone color run.
Pantone colors. Also known as PMS (Pantone Color Matching System), these comprise a set of universal colors that every printer in the world can replicate. Each Pantone color comes with CMYK, RGB, hexadecimal and Pantone color codes. Using these codes helps create color consistency throughout print and digital branding materials.
Crop marks. Printers typically fit multiple prints onto one large sheet of paper. Crop marks indicate where the printer should make cuts to the final printed piece. They are also used to cut and separate the excess paper and other prints.
Digital printing. Also known as 4-color process printing, digital printing is specifically for CMYK color. It is most cost-effective for smaller quantities (250 to 1,000 pieces), as it requires less prep work for the printer.
Finish. This refers to the surface quality of the paper used for the printed piece. Different types of paper have different finishes, such as matte, luster, glossy or textured finish. Commonly used finishes include glossy and matte.
Offset printing. Offset printing is generally used for larger print jobs of 1,000 pieces and up. The printer sets up a different plate for each color, and runs every print through each color plate to create the final printed piece. This requires more setup on the part of the printer. But it enables both CMYK and Pantone colors to be used on the press, and allows for larger initial runs as well as re-runs for larger print jobs.
PPI/DPI. PPI stands for “pixels per inch”; DPI for “dots per inch.” Both are used to communicate the resolution of images, and since they refer to the same measurement can be used interchangeably. There are two standard PPI measurements, with 72ppi referring to the optimal resolution for a computer screen, and 300ppi referring the typical optimal resolution for printed images.
Print document images should always be at 300ppi before sending to print; otherwise they will look blurry and pixilated. If 300ppi images are printing blurry, it means they are too small for the image print area, and a larger image is needed. Making the photo larger in Photoshop will not resolve the pixilation problem.
RGB. RGB is an acronym for “red, green and blue” – the colors that make up all the color combinations seen on a computer screen. Documents and images set for screen viewing are typically in RGB. In order to use the images for print, they must be converted to CMYK in Photoshop. It also helps to make sure they’re at 300ppi, as images taken from the Internet are usually set to 72ppi and may not be large enough to print.
Proof. After prepping the final design files, the printer sets up a printing proof, which is typically a digital file in PDF format. Viewing a printing proof is essential for identifying any design or content-related issues before the piece gets sent to press. Once you approve a proof, you can’t make any more changes. The best way to review the digital proof file (if it’s a PDF) is to open it and view it carefully in Adobe Acrobat. Do not print it for review on your home or office computer, as these printers use different inks and techniques not up to par with professional printers. Viewing the proof on a computer screen is the closest you can get to the actual final product. Any differences will be minute.
If your graphic designer uses a term you don’t understand, always ask for an explanation. Both of you and your finished print piece will benefit from a better understanding of basic print design terms.